Lab #2: Checkerboard
Credit: Based on notes from Sara Mathieson
Note: For labs, feel free to compare code and share ideas.
Also make sure your partner and others around you are making progress.
The goal of this lab is to begin drawing on the HTML canvas with Javascript.
-
Step 1: Clone the starter code on GitHub
Log into your GitHub account. The URL for this lab is https://classroom.github.com/a/Tud7YJj9. Click on this link (or copy and paste into your browser), then "Accept this assignment". You will see a message that your repo is being created. Soon after that, a message confirming that your repo was created will be displayed (you may need to refresh your page).
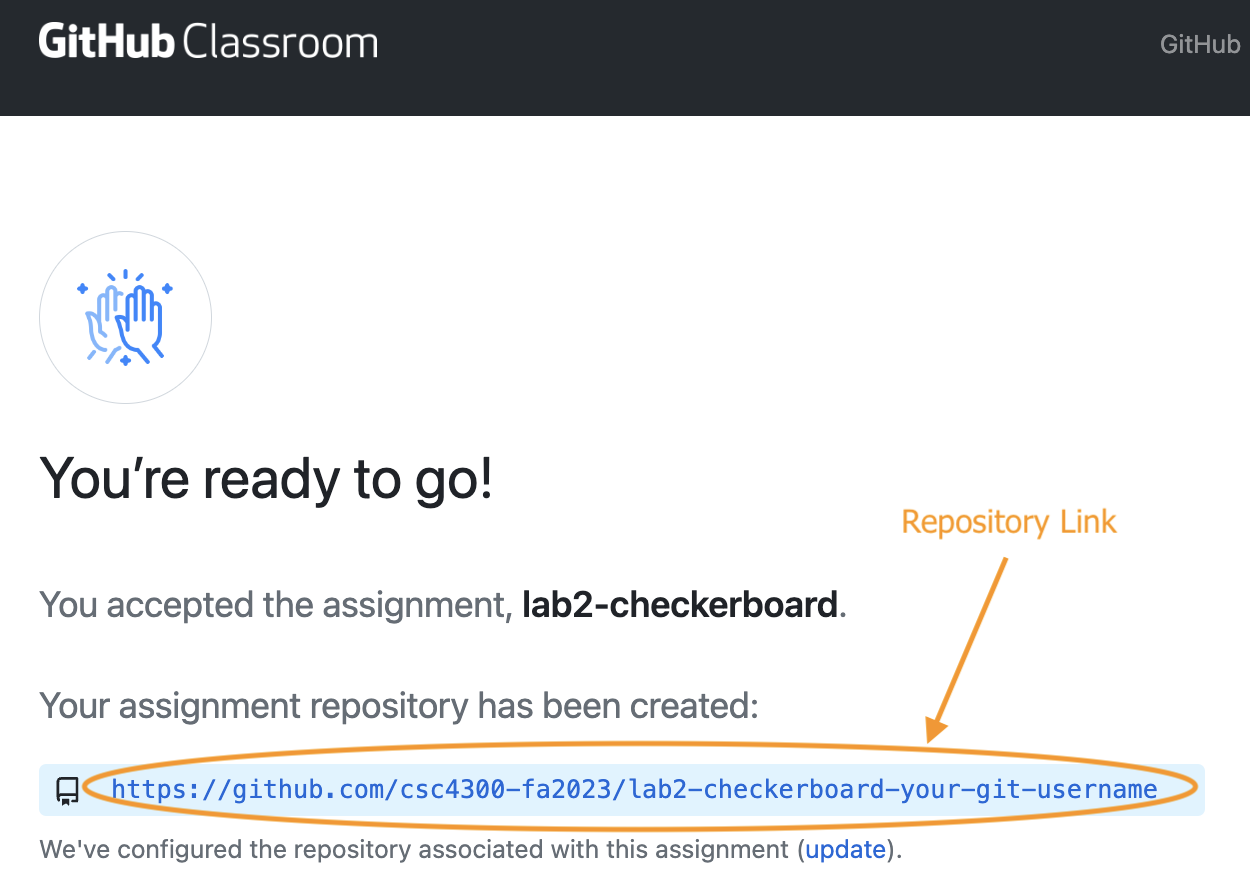 Click the repository link to view your new private repository for lab2.
-
Step 2: Set up a GitHub Pages site
The file lab2.html contains the starter code for this file. To render this HTML file, you'll need to create a GitHub Pages site in your repository. To do so, click Settings in the top horizontal bar, then click Pages in the left sidebar.
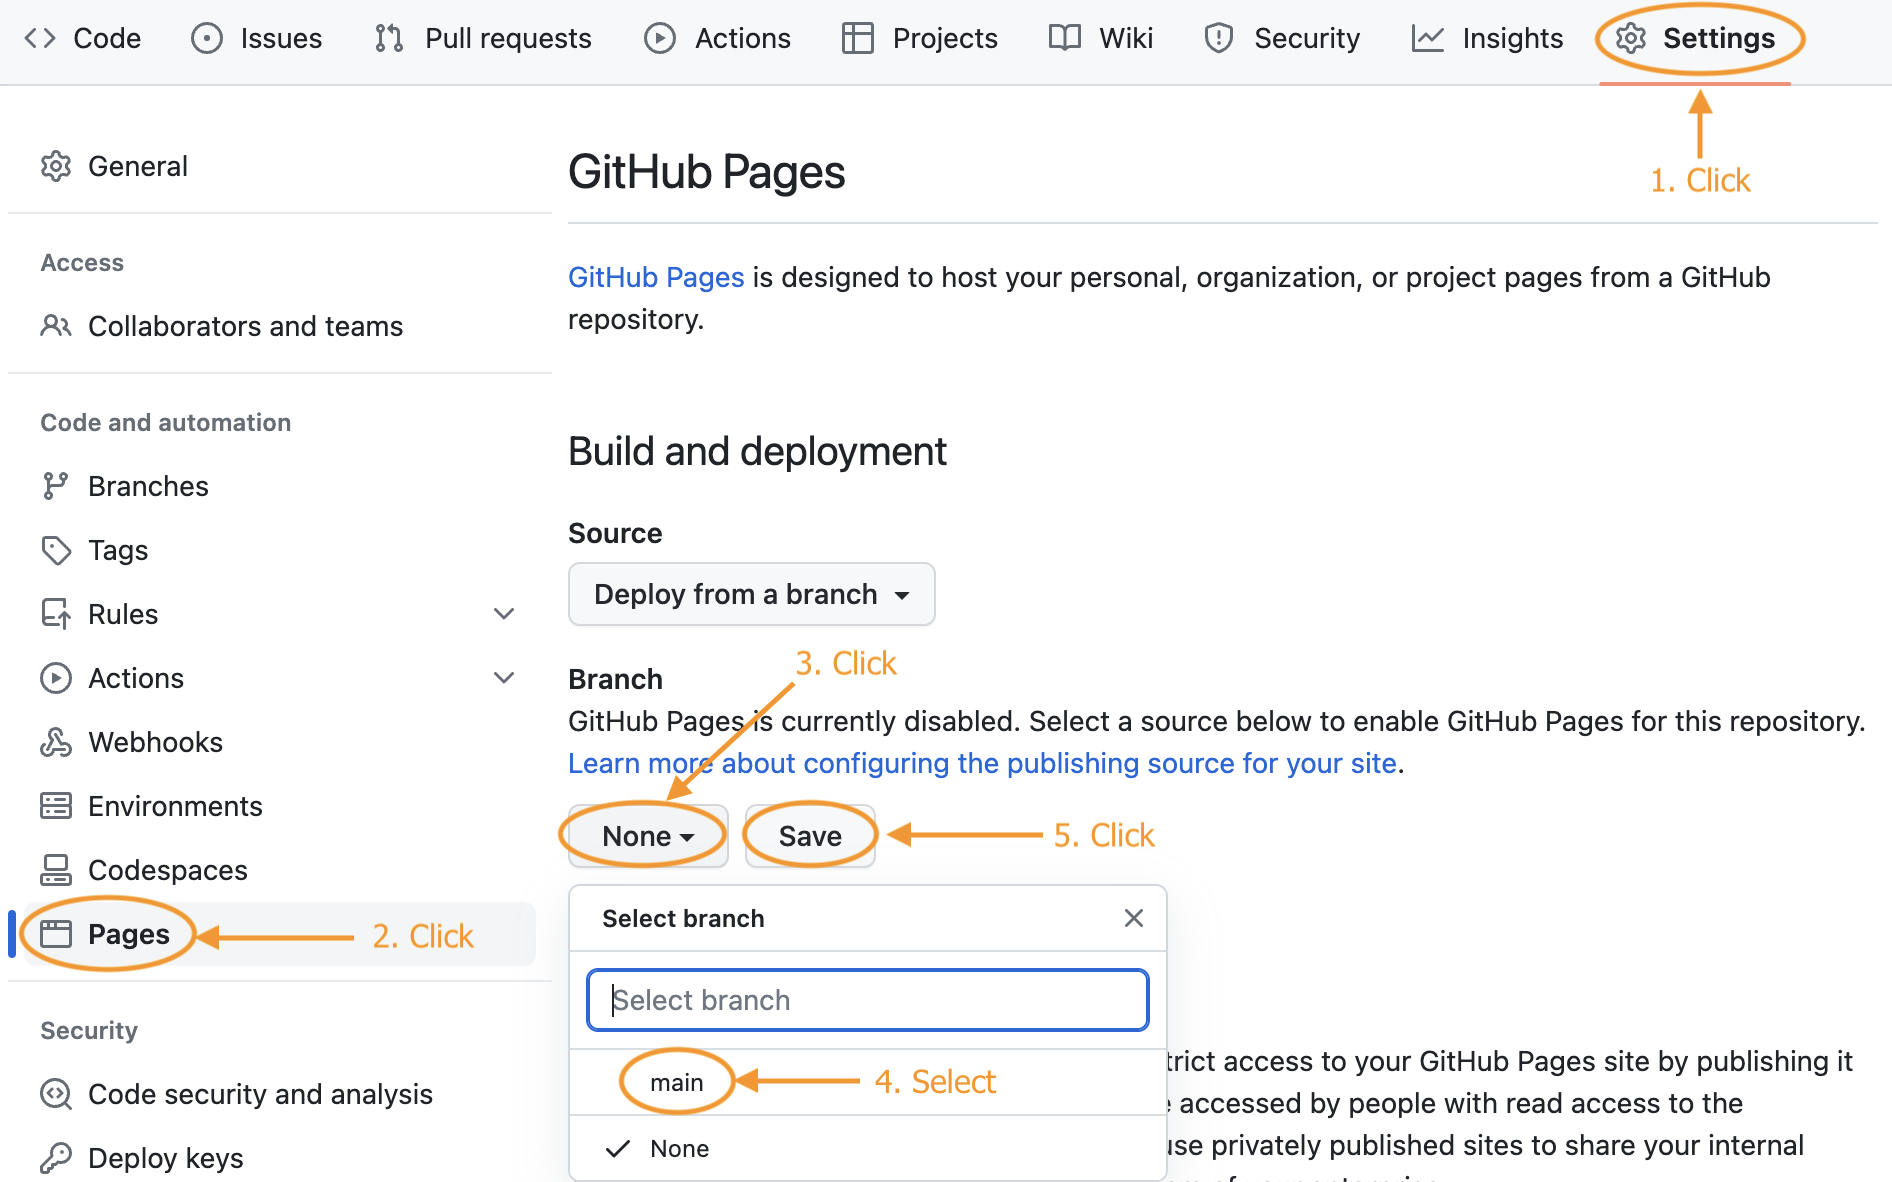 Select the main branch from the drop down menu for the publishing source, then click Save. Be patient, it may take some time for your site to be published. Refresh the page to check the status, until you see that your site is live. The URL for your GitHub Pages site will be displayed.
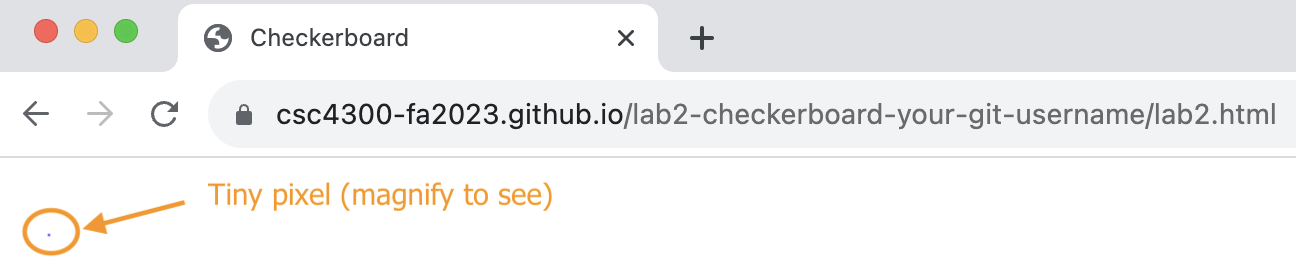
 If you click on the URL for your GitHub Pages site, the contents of README.md will be automatically rendered. We want to render the contents of the HTML file, so append the filename lab2.html to the URL (e.g.,
 https://csc4300-fall2023.github.io/lab2-checkerboard-your-git-username/lab2.html) and hit Enter. You should see a single pixel colored (very small, you may need to zoom in to see it).
-
Step 3: Clone the starter code locally
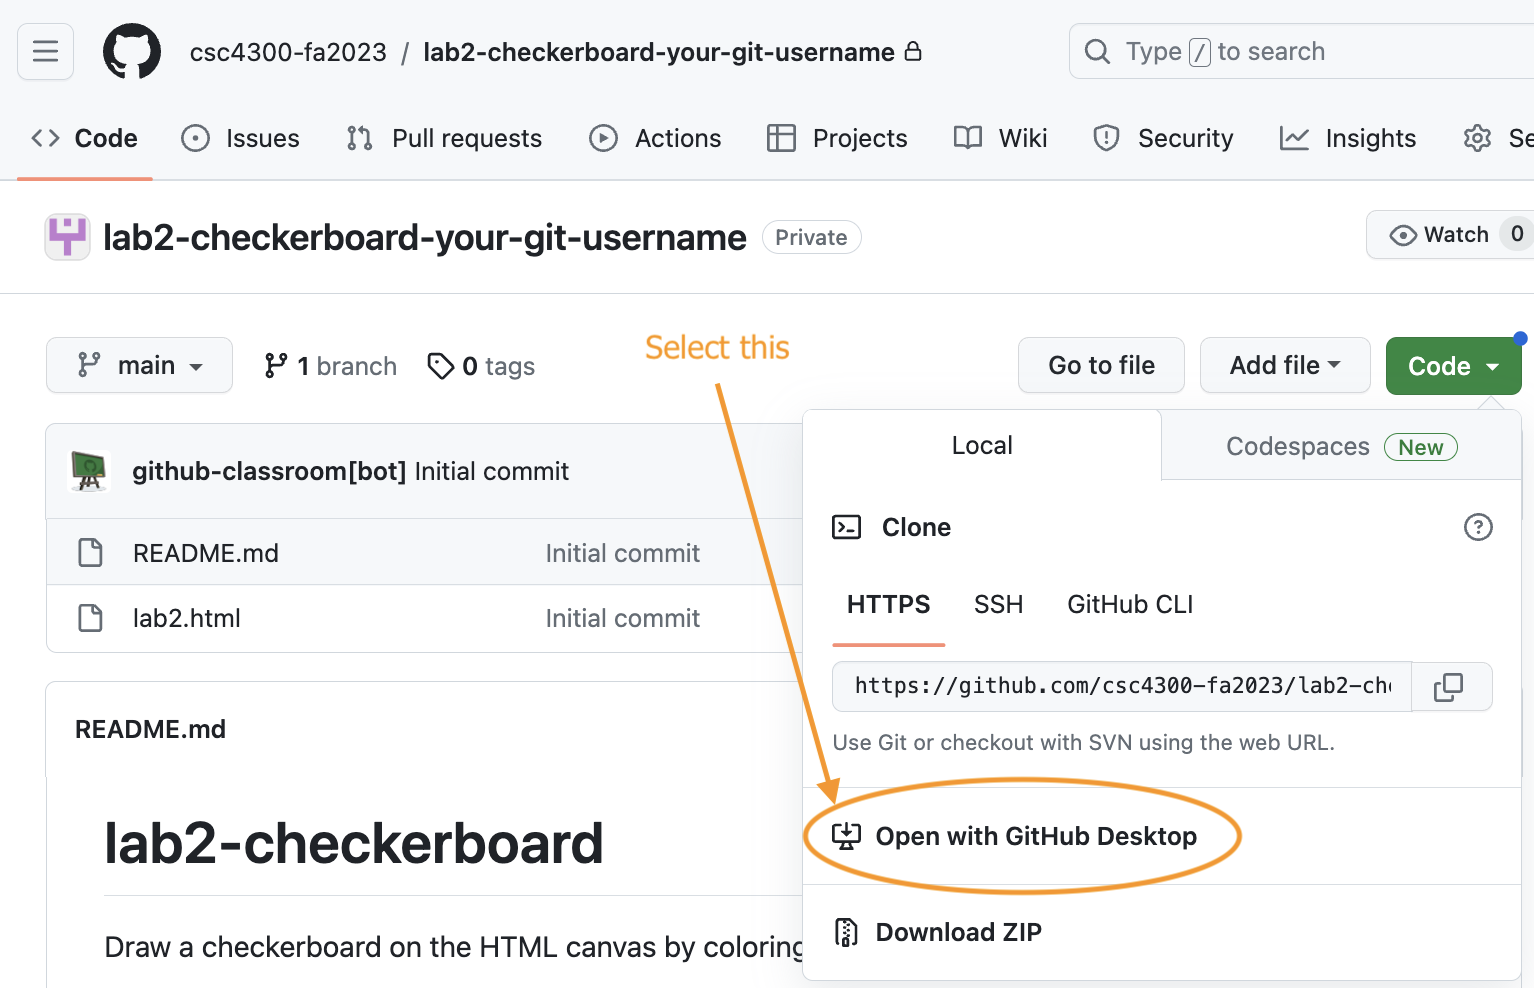
Navigate to your remote repo on GitHub via your browser. Click the green Code button to see options to make a local clone of your repository. Select the option to Open with GitHub Desktop.
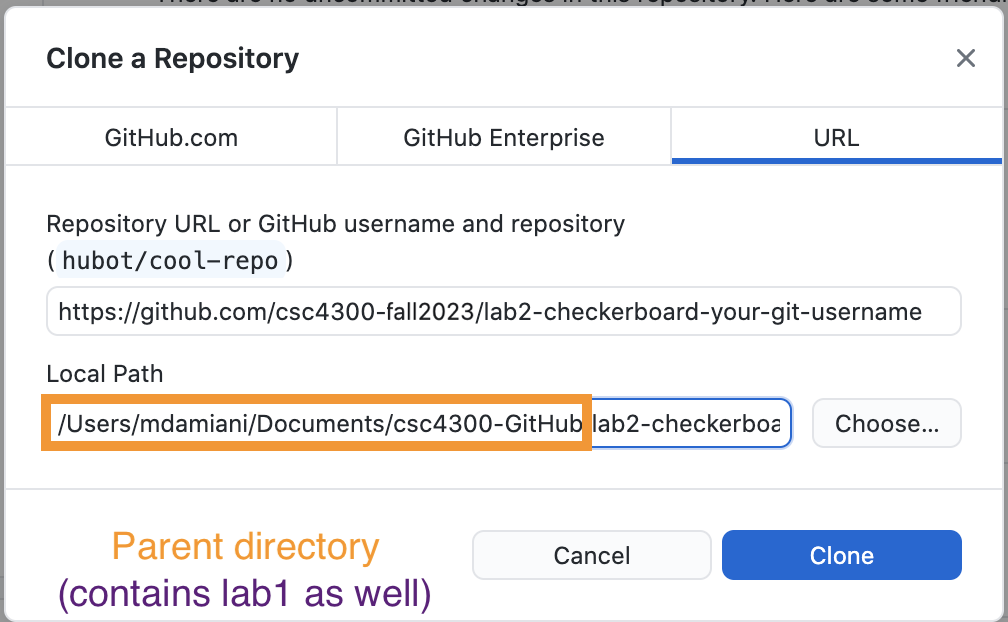
 Next you will be prompted for the path for the local repository. Choose the same local path you did for lab1 (so lab1 and lab2 will have the same parent directory - all the work for this class will be done in this parent directory). Next hit Clone.
 Note: If you're already familiar with Git and GitHub, you may use any client you like.
-
Step 4: Study the code
In GitHub Desktop, click on Show in Finder (or Show in Explorer in Windows) to navigate to the local repository you've created. Open the file lab2.html in your preferred editor (I recommend Sublime Text, if you don't have a preferred editor).
Study the code and make sure it makes sense why that pixel was colored. The starter code includes some boiler-plate code and two methods that you'll modify next.
Important note:
-
All changes must be made to your local (not remote!) repository, then pushed to the remote repository on GitHub. Do NOT edit the files directly on the cloud.
-
Step 5: Loop over all pixels
Inside the function draw(), create a double for loop that goes over all the x values from 0 to canvas.width, and all the y values from 0 to canvas.height. Here is an example of for loop syntax in JavaScript:
for (var i=0; i < 10; i++) {
    // use i here
}
Change the "20" and "30" values to the variable names you used in the for loops.
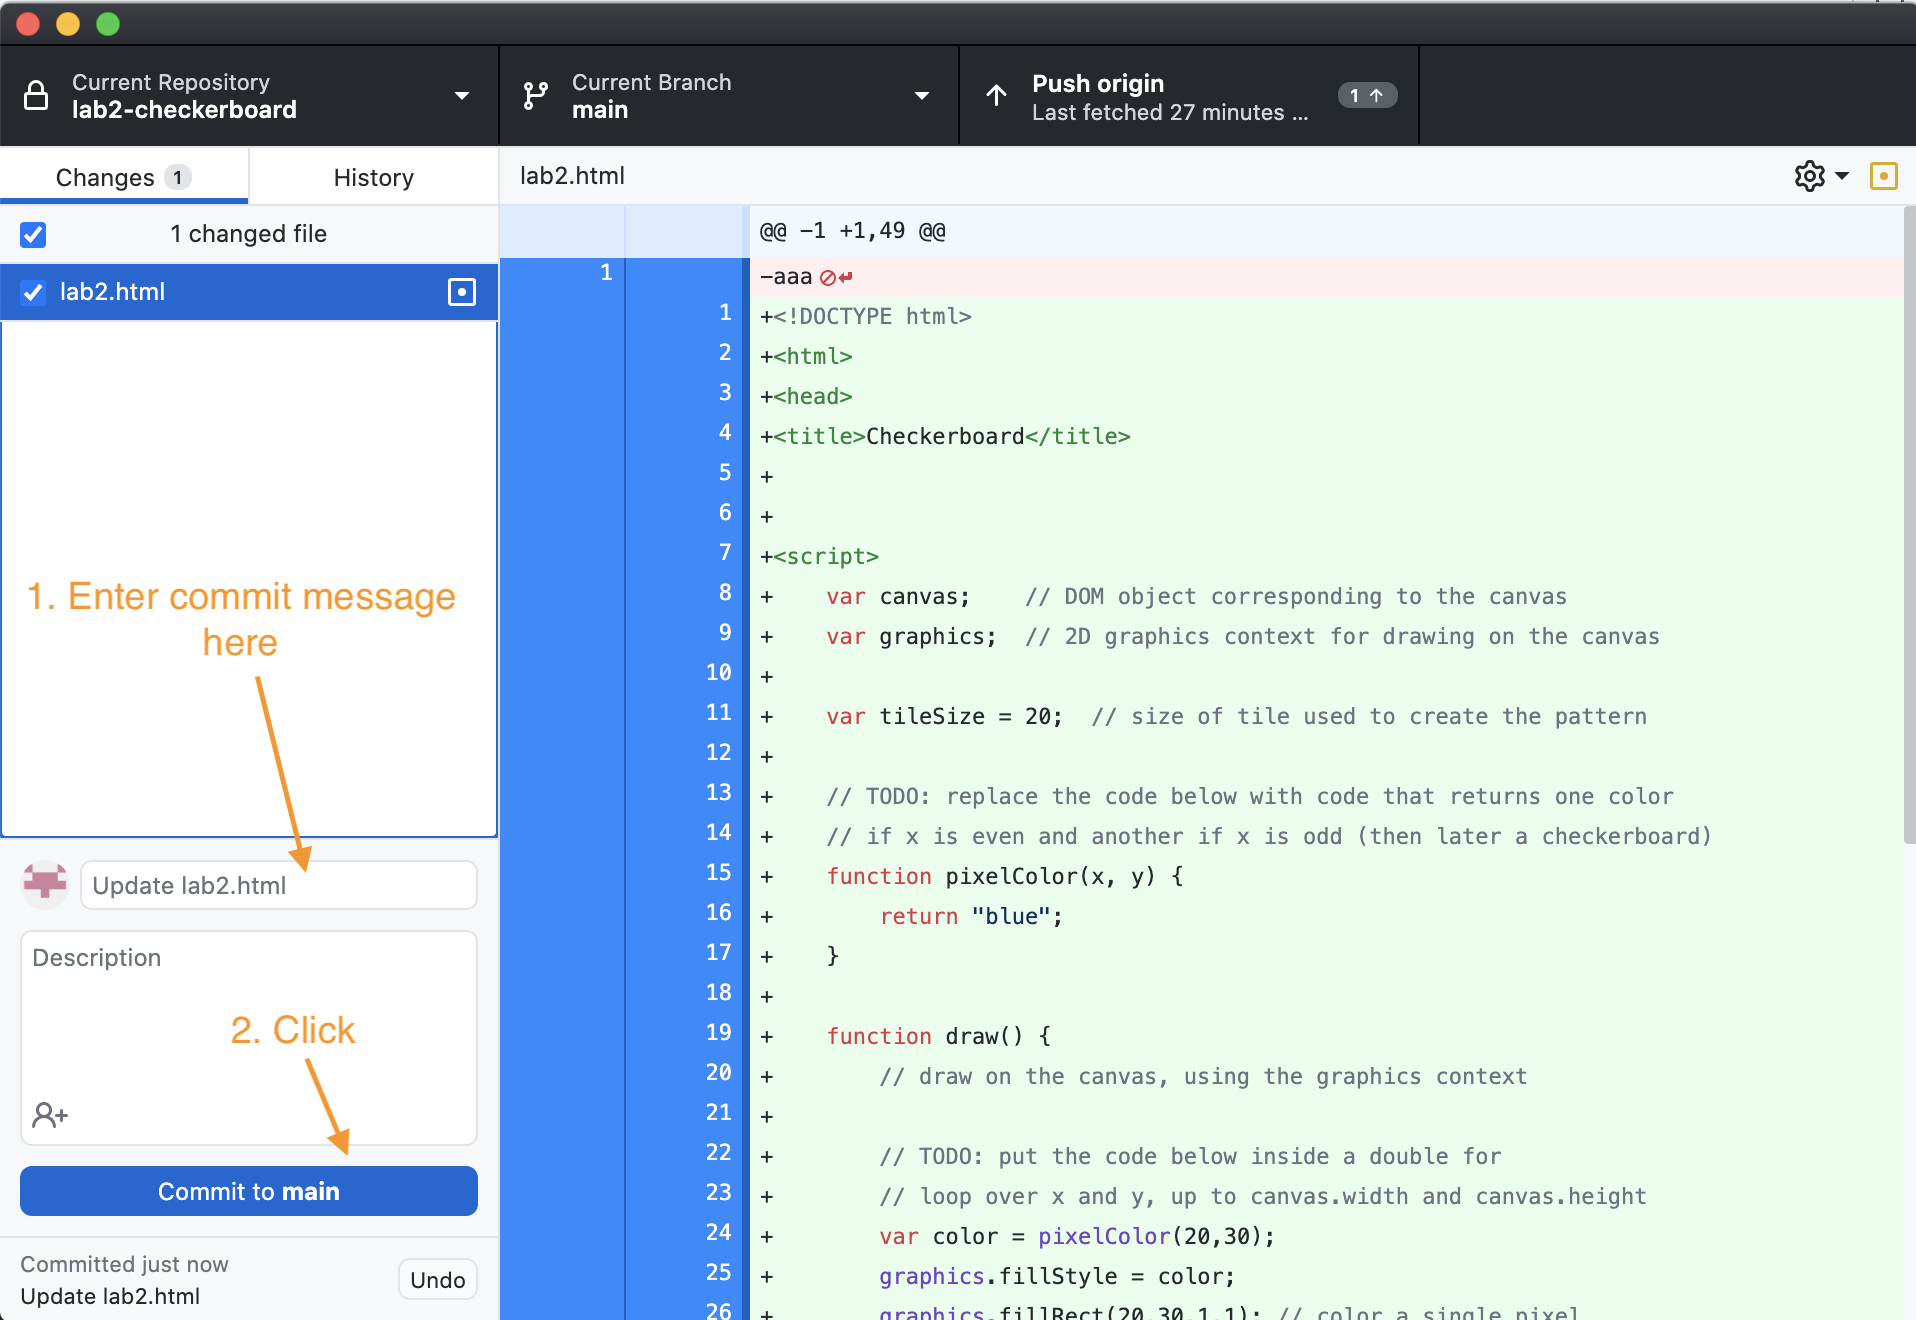
Commit your changes (with comments) to your local repository frequently. To do so, in GitHub Desktop, enter a short commit message in the upper textbox (< 50 chars describing the changes), then click the Commit to main button.
 Render your code locally: For debugging purposes, render the HTML file locally by double-clicking on it in the Finder/Explorer - it will be rendered in a new browser page. If coded correctly, you should see a completely blue rectangle.
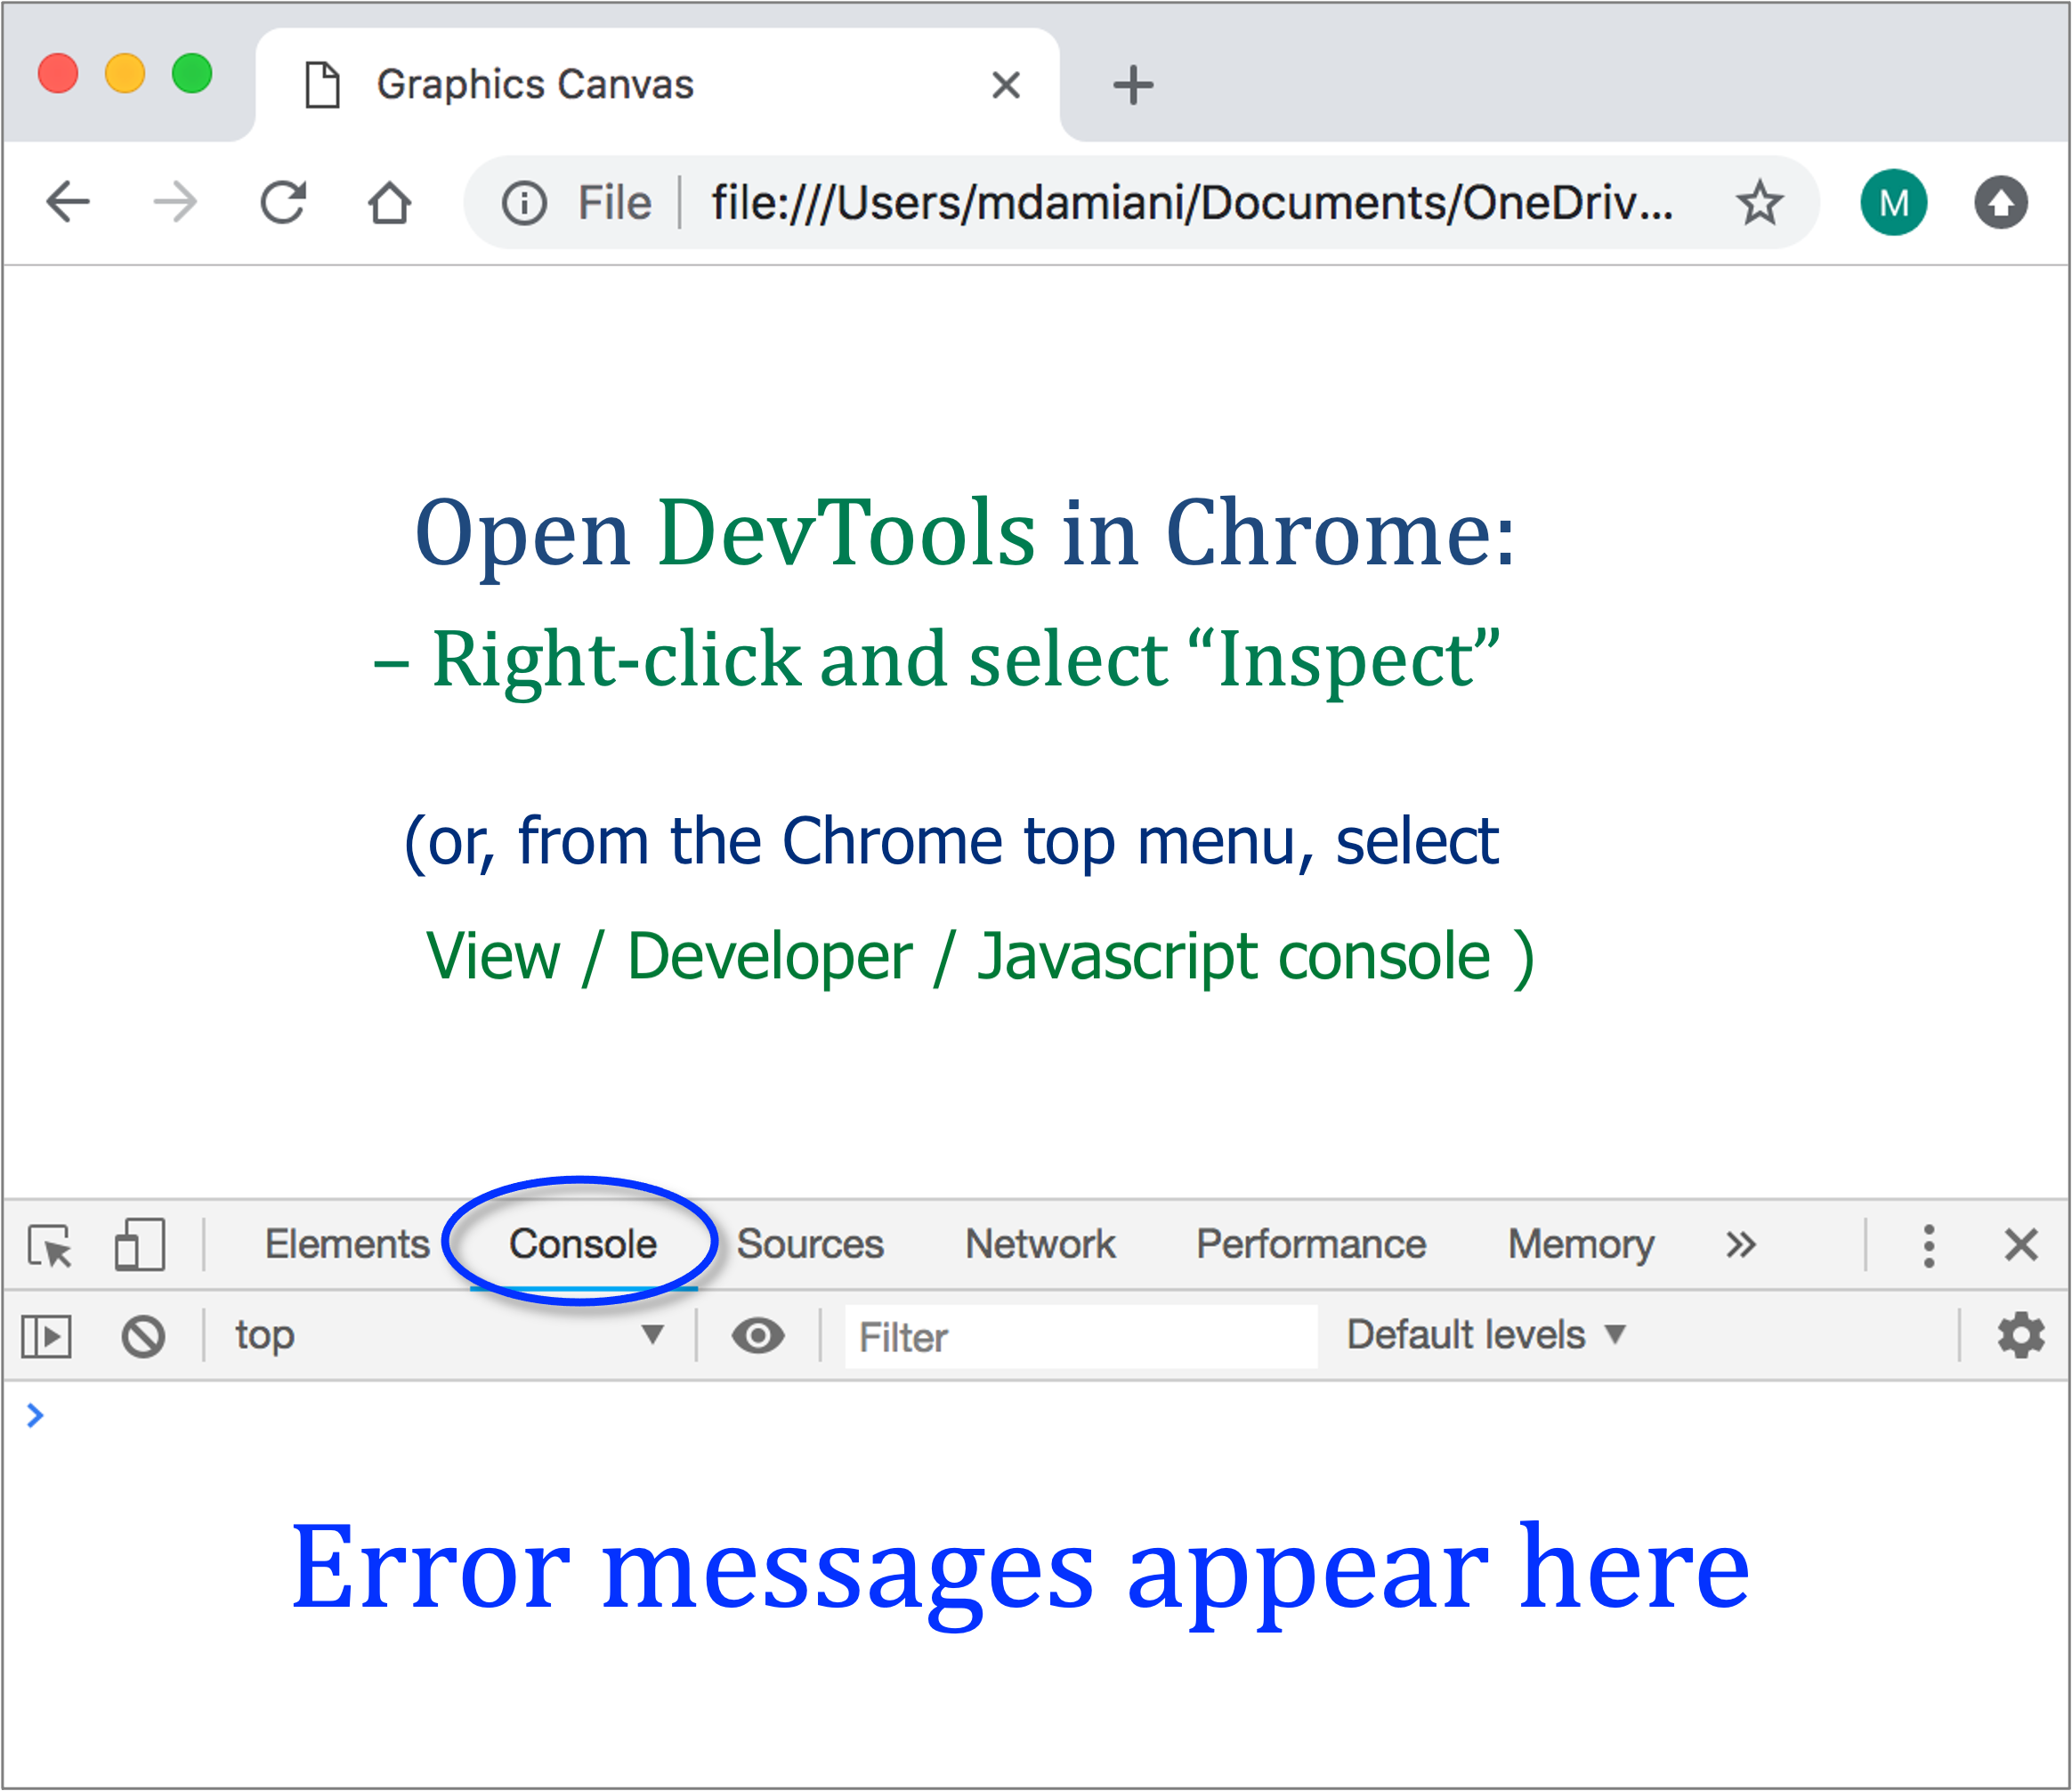
Remember to use the console for debugging (if you're using Chrome, right-click anywhere outside the canvas and select Inspect, then click on the Console tab):
Render your code locally: For debugging purposes, render the HTML file locally by double-clicking on it in the Finder/Explorer - it will be rendered in a new browser page. If coded correctly, you should see a completely blue rectangle.
Remember to use the console for debugging (if you're using Chrome, right-click anywhere outside the canvas and select Inspect, then click on the Console tab):
-
Step 6: Push changes to remote repository
Make sure your code works as expected (the blue rectangle gets rendered) before you start this step.
In GitHub Desktop, click the Push Origin button. Then navigate to your remote repository on GitHub and verify that lab2.html has been updated. Wait a minute or so for your changes to fully synch with GitHub Pages, then render your html file remotely by entering its GitHub Pages URL in a new browser tab (e.g., (e.g., https://csc4300-fall2023.github.io/lab2-checkerboard-your-git-username/lab2.html). You should see the same blue rectangle rendered remotely.
Important note: Updating the GitHub website is often slow, so do not try to render your code remotely too frequently. Work locally instead (by making changes to your code and rendering it locally). Once your code works properly, push your changes to the remote repository, then wait a while for your GitHub website to get updated before you refresh the remote browser page.
If your image doesn't render properly on the remote site: review the source file rendered on the remote site by selecting View / Developer / View source from the Chrome menu - the actual source file will be displayed. Verify that it reflects the latest updates from your GitHub repository. If it doesn't, your changes may not have fully synced with the website, so be patient.
-
Step 7: Modify pixelColor
Go back to your local repository and continue editing lab2.html. Modify pixelColor so that it takes the x and y values of the pixel into account. To start, color the pixel one color if x is even, and another if x is odd (what should this create?) Here is an example of an if statement in JavaScript:
if (x == 10 && y % 2 == 0) {
    // do something here
}
Helpful syntax:
%  // mod operator (i.e. 10 % 2, which equals 0)
&& // Boolean AND operator (same as in Java and C)
|| // Boolean OR operator (same as in Java and C)
For debugging purposes, render the HTML file locally by double-clicking on it. Your image should consist of vertical stripes that are one pixel wide.
-
Step 8: Wider Stripes
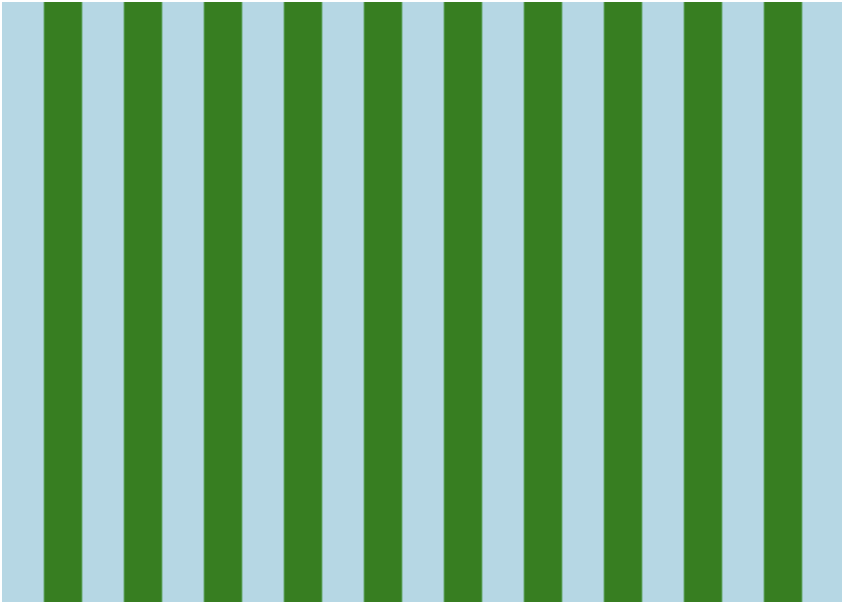
Modify your if statement in pixelColor to widen the stripes as shown in the figure below. Do not modify the fillRect arguments (so you'll need to color individual pixels, as done in the previous step).
|
|
stripes pattern
|
Hint: Notice that the pattern is created through the repetition of a unit consisting of a blue stripe and a green stripe. So, to determine the color of a pixel with coordinates x and y, you may use something similar to this:
var unit = 2 * tileSize;  // length of repeating unit
if (x % unit < tileSize) {
    // pixel is blue
} else {
    // pixel is green
}
Make sure to use the variable tileSize (defined gloablly in your template file) for the size of your tiles (as opposed to a numeric constant), so you can easily change its value as needed. Experiment with different colors.
Step 9: Checkerboard
If you finished Step 8, that's great! If you have extra time,
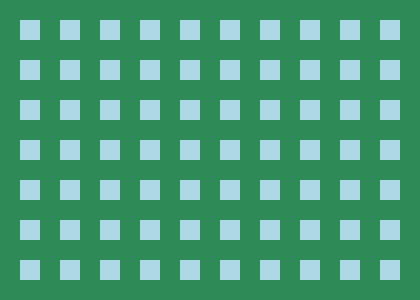
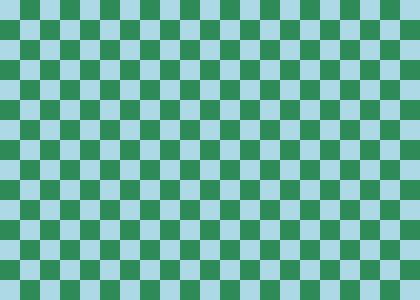
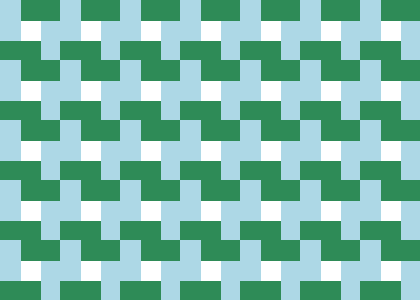
modify your if statement to create a checkerboard pattern (or any of the three patterns below, although the windmill pattern is the most challenging). Modify the size of the squares without modifying the fillRect arguments (apply a similar logic as in the previous step to the vertical dimension of the board).
|
|
|
|
|
|
grid pattern
|
|
checkerboard pattern
|
|
windmill pattern
|
Step 10:
Record this lab experience by entering the data listed below in the Wiki section of your lab2 repository. (Don't forget to scroll down and click Save Page to save your report.)
-
Date lab completed
-
Time spent on lab
-
What is the full URL for the Github webpage rendering lab2.html?
Note: The URL should point to
github.io, not to your local computer. Make sure the link works (i.e., it displays your pattern image when you click on it). Your instructor will check your lab results by clicking on this link.
-
Do you have any corrections to the instructions or suggestions to improve the lab?
Step 11: Submit
Submit this lab on Blackboard to receive credit. You don't need to attach any files; simply click the submit button. That will let your instructor know that you have completed the lab.