Lab #6: Robotic Arm
Credit: Based on notes from Sara Mathieson. In this lab we will see how hierarchical models are used to create nested movement. Note: For labs, feel free to compare code and share ideas. Also make sure your partner and others around you are making progress.-
Step 1: Clone the starter code on GitHub
Log into your GitHub account. The URL for this lab is https://classroom.github.com/a/YHXlqvEJ. Click on this link (or copy and paste into your browser), then "Accept this assignment". You will see a message that your repo is being created. Soon after that, a message confirming that your repo was created will be displayed (you may need to refresh your page). Click the repository link to view your new private repository for this lab. -
Step 2: Set up a GitHub Pages site
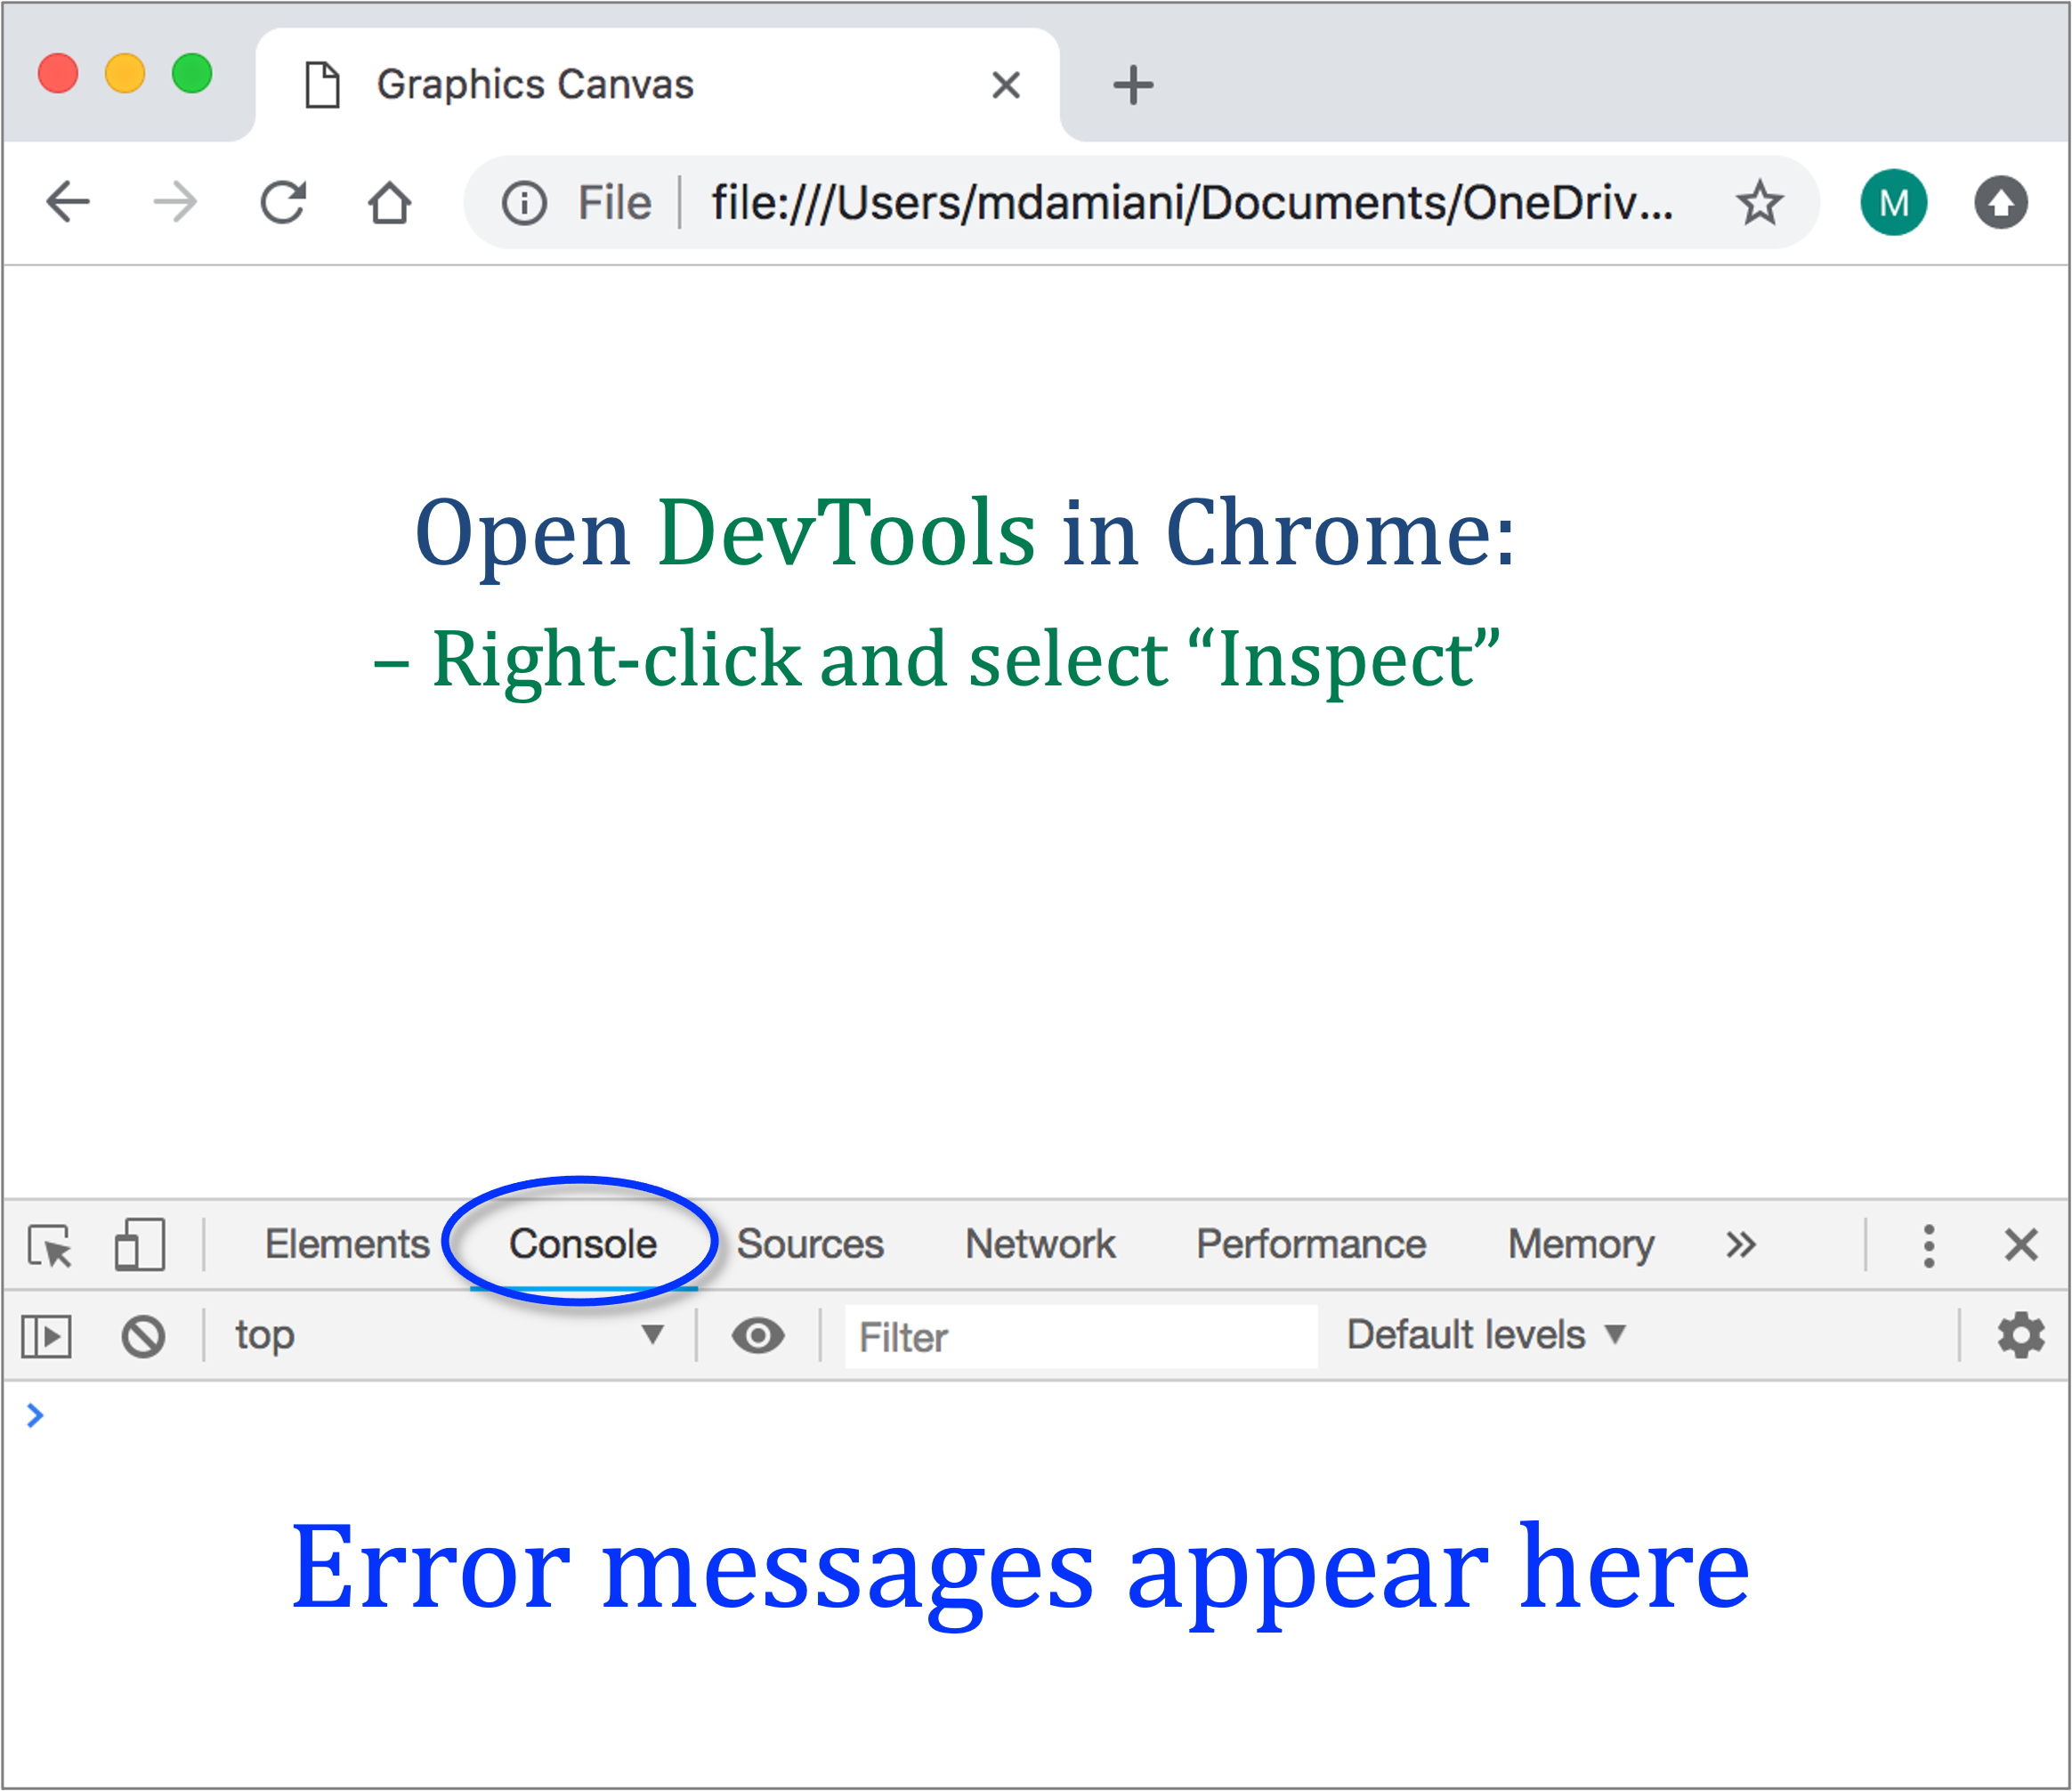
The file lab6.html contains the starter code for this file. To render this HTML file, you'll need to create a GitHub Pages site in your repository. To do so, click Settings in the top horizontal bar, then click Pages in the left sidebar. Select the main branch from the drop down menu for the publishing source, then click Save. Be patient, it may take a few seconds for your site to be published. Refresh the page to check the status, until you see that your site is live. The URL for your GitHub Pages site will be displayed. If you click on the URL for your GitHub Pages site, the contents of README.md will be automatically rendered. We want to render the contents of the HTML file, so append the filename lab6.html to the URL (e.g.,https://csc4300-fall2023.github.io/lab6-robotArm-your-git-username/lab6.html) and hit Enter. You should see something like this: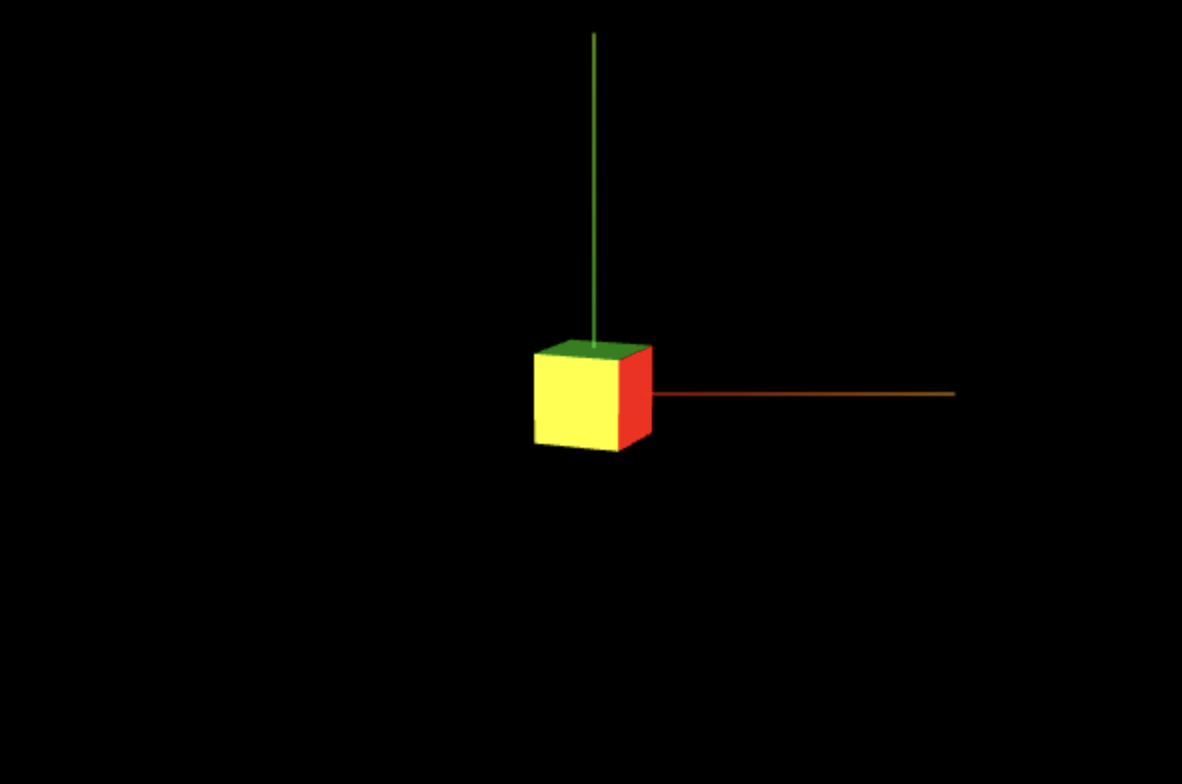
-
Step 3: Clone the starter code locally
Navigate to your remote repo on GitHub via your browser. Click the green Code button to see options to make a local clone of your repository. Select the option to Open with GitHub Desktop. Next you will be prompted for the path for the local repository. Choose the same local path you did for the previous labs (so all labs will have the same parent directory). Next hit Clone. Note: If you're already familiar with Git and GitHub, you may use any client you like. In GitHub Desktop, click on Show in Finder (or Show in Explorer in Windows) to navigate to the local repository you've created. Open the file lab6.html in your preferred editor. This file contains some boiler-plate code and a few methods that you'll modify. Investigate the structure of the code and make sure you understand it.Important note:
- All changes must be made to your local (not remote!) repository, then pushed to the remote repository on GitHub. Do NOT edit the files directly on the cloud.
-
Step 4: Scale, Translate and Rotate
In this step we will focus on thecreateArmfunction. This function creates and returns a cube object centered at the origin. All transformations applied to this object are relative to this origin. First, we scale this cube and translate it so that the left end of the arm is centered at the origin. In thecreateArmfunction, add the following lines of code and fill in the question marks to get a picture similar to the left one shown below.cubeMesh.scale.set(?,?,?); // scale in the x,y,z directions cubeMesh.position.x = ?; // translate in the x direction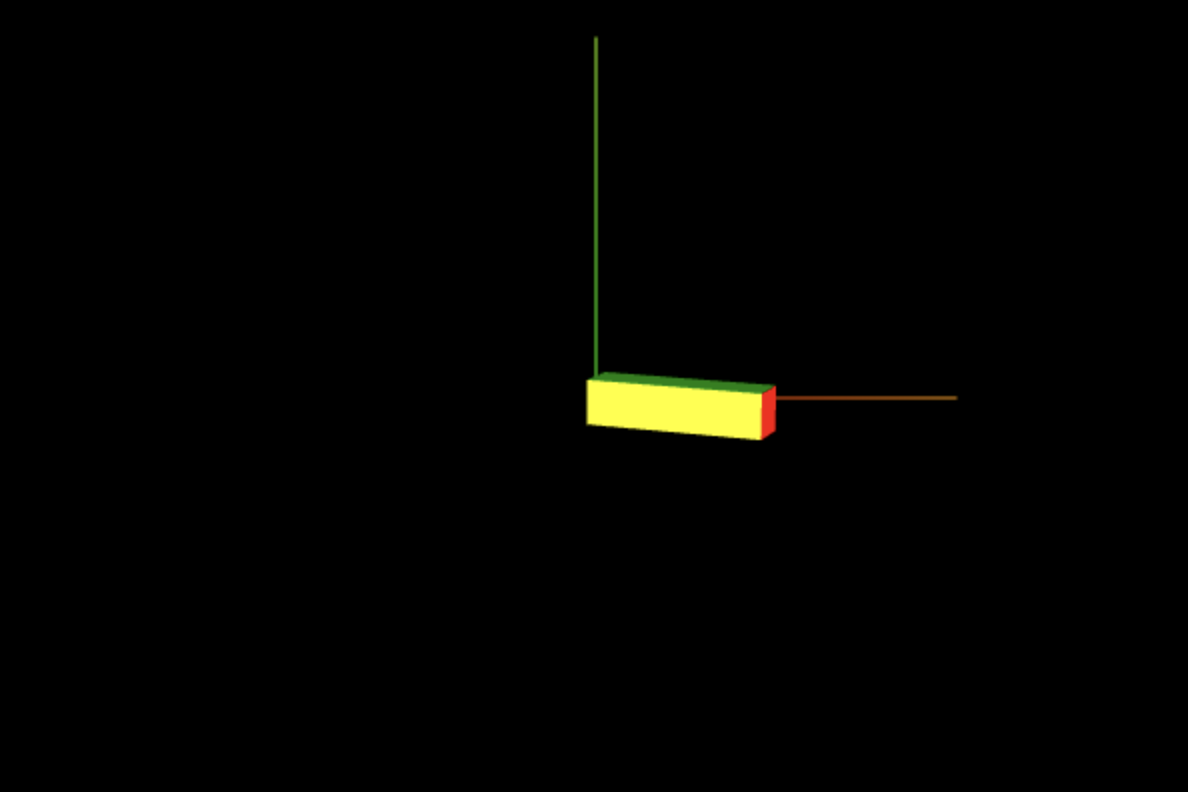
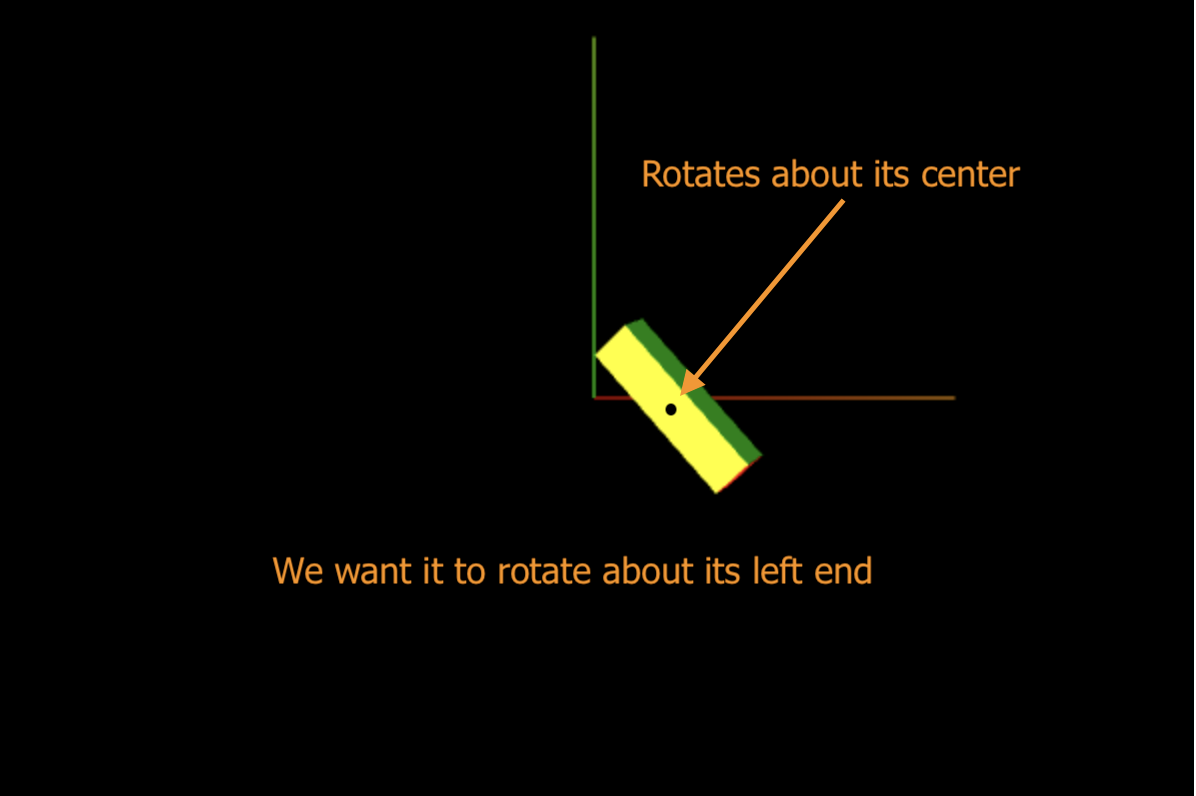
Render again the HTML file locally. You should get something similar to the right image above. Where is the rotation point? We would like the arm to rotate about its left end (center at the world origin), not about its center. We will fix this in the next step. For now, comment out the rotation line above.cubeMesh.rotation.z -= Math.PI/4; // rotate clockwise about z -
Step 5: Arm Container
In order to fix the rotation point forcubeMesh, we'll need to place it in a parent container (let's call the containerarm), and reposition the mesh relative to its container. So arm will be the parent of cubeMesh. When arm rotates about its origin, all its descendants (in this case, cubeMesh) will also rotate about this origin. Add the code below at the end of createArm() to create an arm parent container for thecubeMesh.
Then, inside the rendering loop, increment the rotation angle (about what axis?) of the upperArm. You should end up with the upperArm spinning about the origin (canvas center):// Initialize the upper arm container var arm = new THREE.Object3D(); arm.add(cubeMesh); return arm; // replaces the "return cubeMesh" line
- Test your code locally (check the console for errors).
- Commit your changes to your local repository.
- Push your code to the remote repository.
-
Step 6: Add the lower arm
Now that ourcreateArmcode works properly and rotates the arm piece about its left end, we focus on thecreateScenefunction to create the entire robot arm. The robot arm is composed of two pieces:upperArm(already created) andlowerArm. Notice that both are declared global, so they can be accessed by different functions. IncreateScene, create the lowerArm object by invoking thecreateArm()method (we use the same method since both upper and lower arms have the same geometry and materials). To complete the hierarchical structure of your arm, add lowerArm to the upperArm container (not to thescene), so upperArm becomes the parent oflowerArm. This way, when upperArm rotates about its origin, lowerArm rotates along with it, as shown below:
positionattribute, which indicates the position relative to the parent). Your animation should now look similar to the one above. Do this frequently:- Test your code locally (check the console for errors).
- Commit your changes to your local repository.
- Push your code to the remote repository.
-
Step 7: Rotate both arms
Finally, rotate lowerArm inside the rendering loop (so you will have two rotations inside the loop).
lowerArmrotates in the reference system of its parentupperArm. Do this frequently:- Test your code locally (check the console for errors).
- Commit your changes to your local repository.
- Push your code to the remote repository.
-
Step 8: Using the keyboard
Instead of creating this continuous animation, we will explore user input. The goal of this step is to move the upperArm clockwise/counter-clockwise when the user presses the left/right arrow keys, and to move the lowerArm clockwise/counter-clockwise when the user presses the down/up arrow keys. For this, we will use the KeyboardState.js library available on github. Uncomment the line at the beginning of your program:<script src="https://csc-vu.github.io/lib/KeyboardState.js"></script>
Also uncomment the creation of the global keyboard object, the update() function, and the call to update() inside the rendering loop. Now, instead of having the rotation code inside the rending loop (which needs to be commented out), add it to the appropriate place in theupdatefunction. Test it out with your keyboard! Notice the difference in behavior betweenkeyboard.downandkeyboard.pressed. Do this frequently:- Test your code locally (check the console for errors).
- Commit your changes to your local repository.
- Push your code to the remote repository.
-
Step 9: Test your code remotely
Make sure you pushed your latest changes to the remote repository on GitHub. Navigate to your remote repository on GitHub and verify thatlab6.htmlhas been updated. Wait a minute or so for your changes to fully synch with GitHub Pages, then render your html file remotely by entering its GitHub Pages URL in a new browser tab. You should see the same animation rendered remotely. -
Step 10:
Record this lab experience by entering the data listed below in the Wiki section of your lab repository. (Don't forget to scroll down and click Save Page to save your report.)- Date lab completed
- Time spent on lab
- What is the full URL for lab6.html? Make sure it works (clicking on this link from any computer should render your image).
- Do you have any corrections to the instructions or suggestions to improve the lab?
-
Step 11: Submit
Submit the lab assignment on Blackboard to receive credit for this lab. You don't need to attach any files; simply click the submit button. That will let your instructor know that you have completed the lab. The next homework assignment will build upon concepts learned in this lab, so please make every effort to complete and understand this lab.